INTRODUCTION
The AI Summary feature in Investwell CRM turns a call recording into a transcript, a short summary and a set of suggested actions (such as Tasks) in a few clicks, right from the Note section of a meeting. It saves you from typing up notes by hand and helps make sure follow-ups from a call are not missed.
You stay in control throughout: the AI only suggests actions. Nothing is added to your CRM until you review a suggestion and confirm it.
Path: CRM → Meetings → View Meeting → Note → Add
TABLE OF CONTENTS
- INTRODUCTION
- Purpose of AI Summary
- Supported Recordings
- Using AI Summary
- Step 1: Open the Note window
- Step 2: Upload the call recording
- Step 3: Review the transcript
- Step 4: Generate the AI Summary
- Step 5: Review the summary and suggested actions
- Step 6: Create a Task from a suggestion
- Step 7: Save the note
- Step 8: Find suggestions later under AI Actions
- Things to Keep in Mind
Purpose of AI Summary
- Skip manual note-taking by uploading a call recording instead of typing out what was discussed.
- Get a transcript of the recording, shown in the language spoken on the call.
- Read a short summary that captures the key points, decisions and commitments from the conversation.
- Receive suggested actions (Tasks, and Leads or Opportunities where the call mentions them) that you can accept or discard.
- Keep everything in one place, with the recording, transcript, summary and actions stored on the meeting itself.
Supported Recordings
- File types: MP3, WAV, M4A and MP4.
- Maximum size: up to 25 MB per file.
- You can select several files at once. They are added to the note one after another.
Using AI Summary
Step 1: Open the Note window
Open the meeting from the Meetings module. On the View Meeting page, find the Note section and click Add.
Path: CRM → Meetings → click on the meeting name → Note → Add
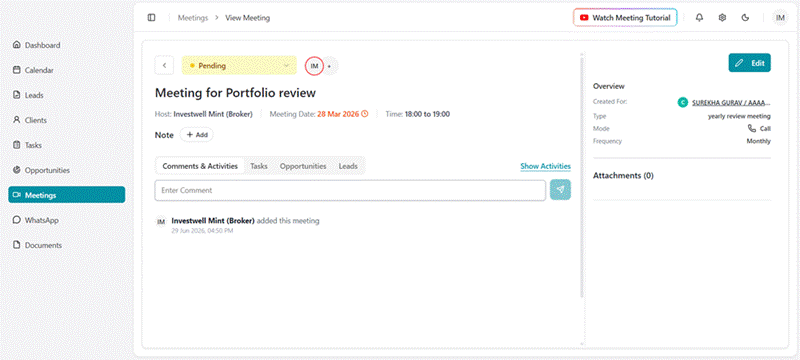
Figure 1: View Meeting page with the Add button next to Note
Step 2: Upload the call recording
The Add note window opens. Along with the text editor, you will see these options at the top:
- Speech to Text: dictate your notes instead of typing them.
- Upload Recording: upload a call recording so it can be transcribed and summarised.
- Quick Action: a shortcut for creating follow-up items.
Note: The Summarize with AI button stays greyed out until the note has content (typed text or a transcript).
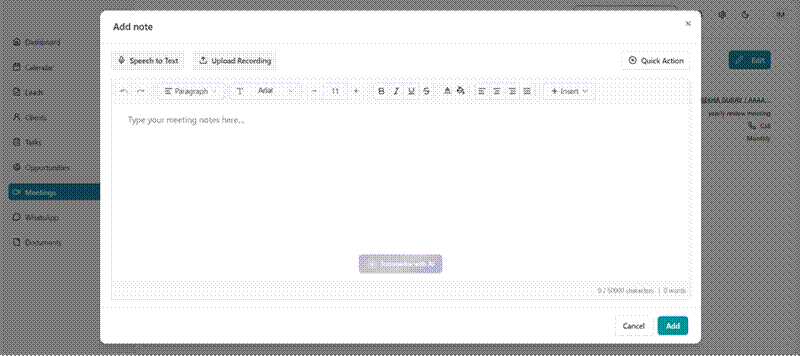
Figure 2: Add note window with Speech to Text, Upload Recording and Quick Action options
Click Upload Recording. A box opens where you can select your audio or video file. Supported formats are MP3, WAV, M4A and MP4, up to 25 MB each. You can pick several files at once.
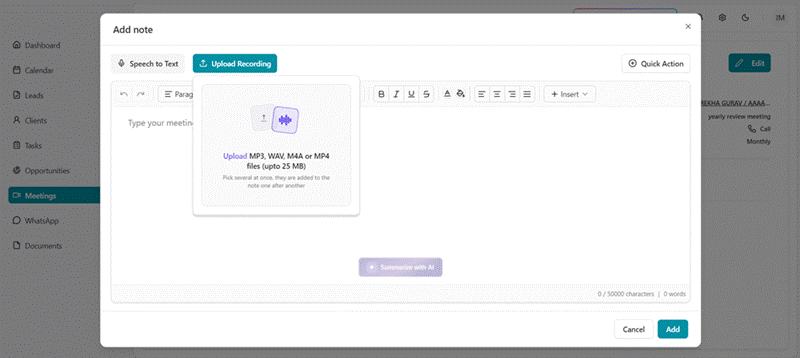
Figure 3: Upload Recording box showing supported formats and the 25 MB limit
Once the file is selected, a progress bar appears with the message "Listening to the recording...". Wait for it to finish. You can cancel the upload using the X next to the file name.
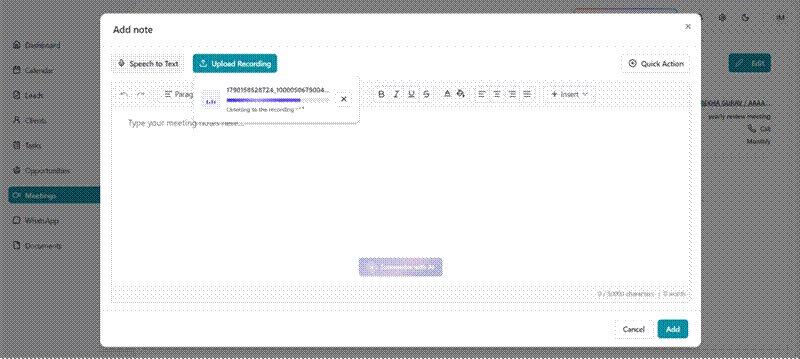
Figure 4: Recording being processed ("Listening to the recording...")
Step 3: Review the transcript
When processing is complete, the transcript of your recording appears in the note under a TRANSCRIPT heading, along with the name of the uploaded file. The transcript is shown in the language spoken on the call. Read through it to make sure it looks right. The Summarize with AI button is now active.
If you uploaded the wrong file, use the bin icon next to the file name to remove it.
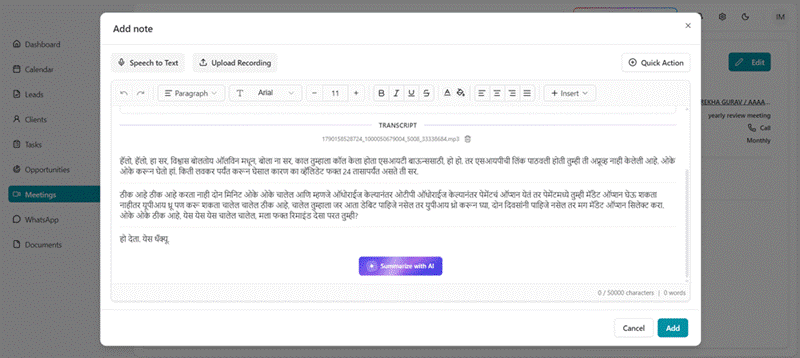
Figure 5: Transcript of the uploaded recording with the Summarize with AI button enabled
Step 4: Generate the AI Summary
Click Summarize with AI. The AI reads the conversation and prepares a summary and a list of suggested actions. This usually takes a few moments. While it works, you will see "Reading the conversation..." and a "Summarizing..." indicator.
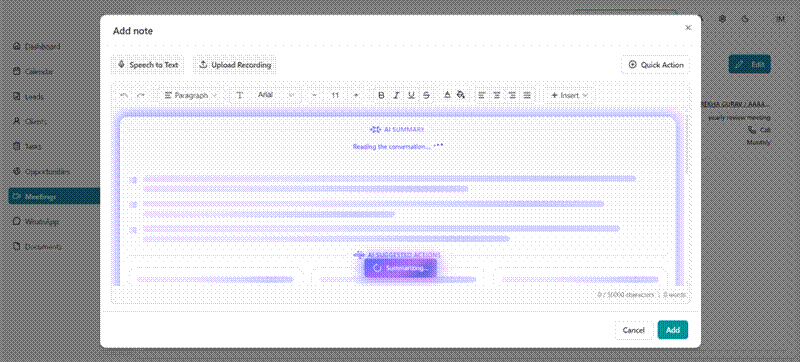
Figure 6: AI Summary and AI Suggested Actions loading
Step 5: Review the summary and suggested actions
When the AI is done, two sections appear in the note:
- AI SUMMARY: a short description of what was discussed on the call, including important names, dates, amounts and follow-ups.
- AI SUGGESTED ACTIONS: actions the AI recommends based on the conversation, grouped by type. The number on each type badge (for example, Task 1) shows how many suggestions it contains.
Each suggested action shows a title and the user it would be assigned to. Two buttons let you decide what to do with it:
- Green tick: accept the suggestion and create it.
- Red bin: discard the suggestion.
Important: AI can make mistakes. Please review the summary and every suggestion before using them.
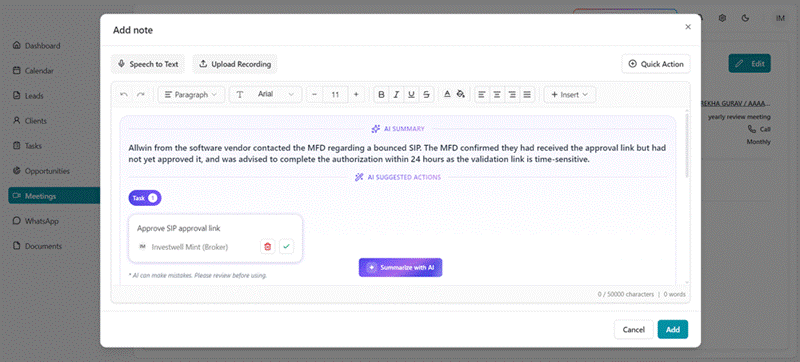
Figure 7: AI Summary and a suggested Task with accept (tick) and discard (bin) buttons
Step 6: Create a Task from a suggestion
Click the green tick on a suggested Task. The Create Task box opens with the details already filled in from the call. Check and edit them if needed:
- Task title: change the wording if you want it to be clearer.
- Assignee: the user who will be responsible for the task.
- Due date: pre-filled based on the conversation. Change it if the date is not right.
Click Add to create the task, or Cancel to go back without creating it.
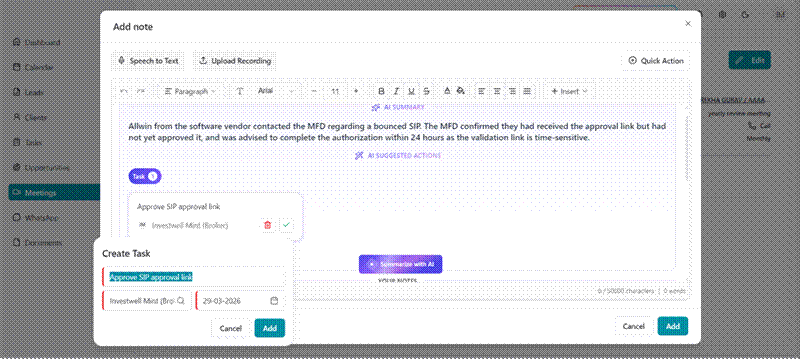
Figure 8: Create Task box opened from a suggested action
Step 7: Save the note
Click Add at the bottom of the Add note window to save the note to the meeting.
Back on the View Meeting page, the Note section now shows:
- A preview of the AI summary.
- The uploaded recording file.
- An "AI summary" label showing how many suggested actions are available.
- A "View transcript & summary" link to read the full transcript and summary again at any time.
- Icons below the note to edit, send, download or delete it.
The note also shows when it was last edited and by whom.
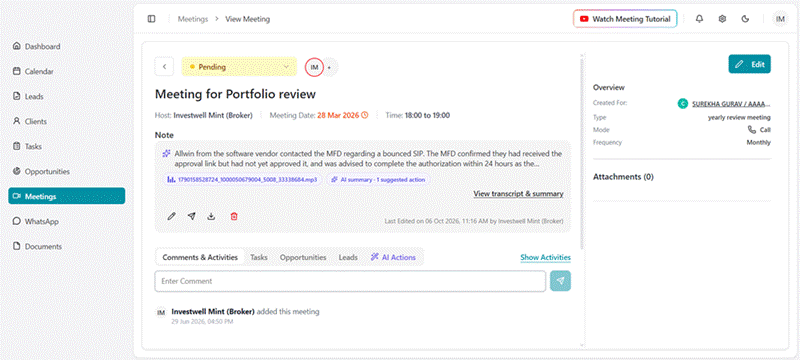
Figure 9: Meeting page showing the saved note with summary preview and recording
Step 8: Find suggestions later under AI Actions
Suggested actions are also kept on the meeting in the AI Actions tab, next to Comments & Activities, Tasks, Opportunities and Leads. If you were not ready to act on a suggestion earlier, you can come back here, then accept it with the green tick or discard it with the red bin.
Path: CRM → Meetings → click on the meeting name → AI Actions tab
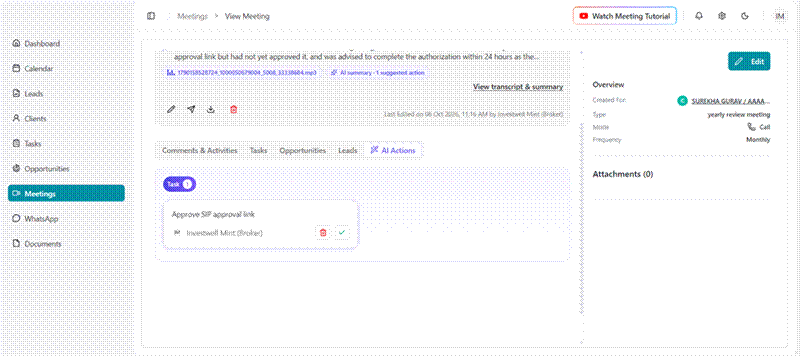
Figure 10: AI Actions tab on the meeting page
Things to Keep in Mind
- Always review the summary and suggested actions before using them. The AI works from the recording, so unclear audio, background noise or overlapping speakers can affect accuracy.
- The AI only suggests what was actually said on the call. If nothing actionable was discussed, no actions will be suggested.
- Sensitive details mentioned on a call, such as passwords or OTPs, are masked in the summary and suggestions.
- If your file is larger than 25 MB or is not in a supported format, compress or convert it and upload it again.
- Suggested actions are not added to the CRM until you accept them.
Was this article helpful?
That’s Great!
Thank you for your feedback
Sorry! We couldn't be helpful
Thank you for your feedback
Feedback sent
We appreciate your effort and will try to fix the article